Do you want to add a Sticky Sidebar to Your WordPress website? So you’re in the right place, today I Will tell you, How to add a Sticky Sidebar in WordPress.
The Sidebar and Widgets play an important role in your website, especially if you have a blog website, where you display the sidebar on your blogs.
Many people want to add a Floating Sidebar on the Scrolling sidebar of their website, to give their customers more quality.
To add a Sidebar or a Scrolling Sidebar to your website is easy, you can do it by just installing a free plugin on your WordPress website.
You can create your own custom sidebar in WordPress. Using a custom sidebar will enable you to try out a different look for your site.
The floating or sticky sidebar to your screen, as you scroll, tends to have a higher click-through rate. This is why many websites make their sidebar sticky and float while scrolling the page.
In This blog, I will show you How to add a Sticky Sidebar or Scrolling Sidebar Widgets to Your WordPress Website.
How to add Sticky Sidebar or Scrolling Sidebar Widgets
To add a Sticky Sidebar or Scrolling Sidebar to Your website, you need to install a plugin called- Sticky Menu, Sticky Header (or anything!) on Scroll
Let’s extend further and start learning about adding Sticky Sidebar or Scrolling Sidebar Widgets in WordPress.
1- Install The Sticky Sidebar Plugin
First, go to Dashboard > Plugins > Add New and From here Search for the Sticky Sidebar from the search box, as shown in the screenshot below.

Click on the Install Now button, and then Activate the plugin.
2. Find the element’s ID
Now you have to find the element’s ID of the Sidebar or the Widget.
To find the Elements ID, From the inspector in your browser (Chrome, Firefox, Safari) Navigate in your browser to the page you want to work with. Right-click on that page (anywhere) and select “Inspect Element“. Search inside the site’s markup for the body tag.
Here you will find the Sidebar ID, and Class, in the below screenshot you can see on our website the Sidebar ID is secondary. So we have to add the #secondary ID on the plugin that we have earlier installed. Copy Element ID

3- Open Sticky Sidebar Plugin Settings
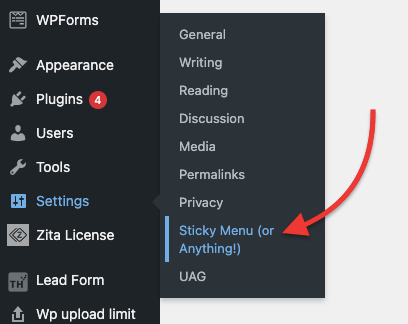
Open the Sticky Sidebar settings page, Go to Dashboard > Settings > Sticky Menu (or Anything!) as you can see on the screenshot below.

4- Insert Element ID
On the Sticky Sidebar plugin settings page, you have the insert the Sidebar Element ID, on the Sticky Element section. Like our Element ID is #Secondary so we have inserted #Secondary on the Sticky Element field, you can use your Element.

After adding the Element ID in the field now click on the Save Changes button to save your edits.
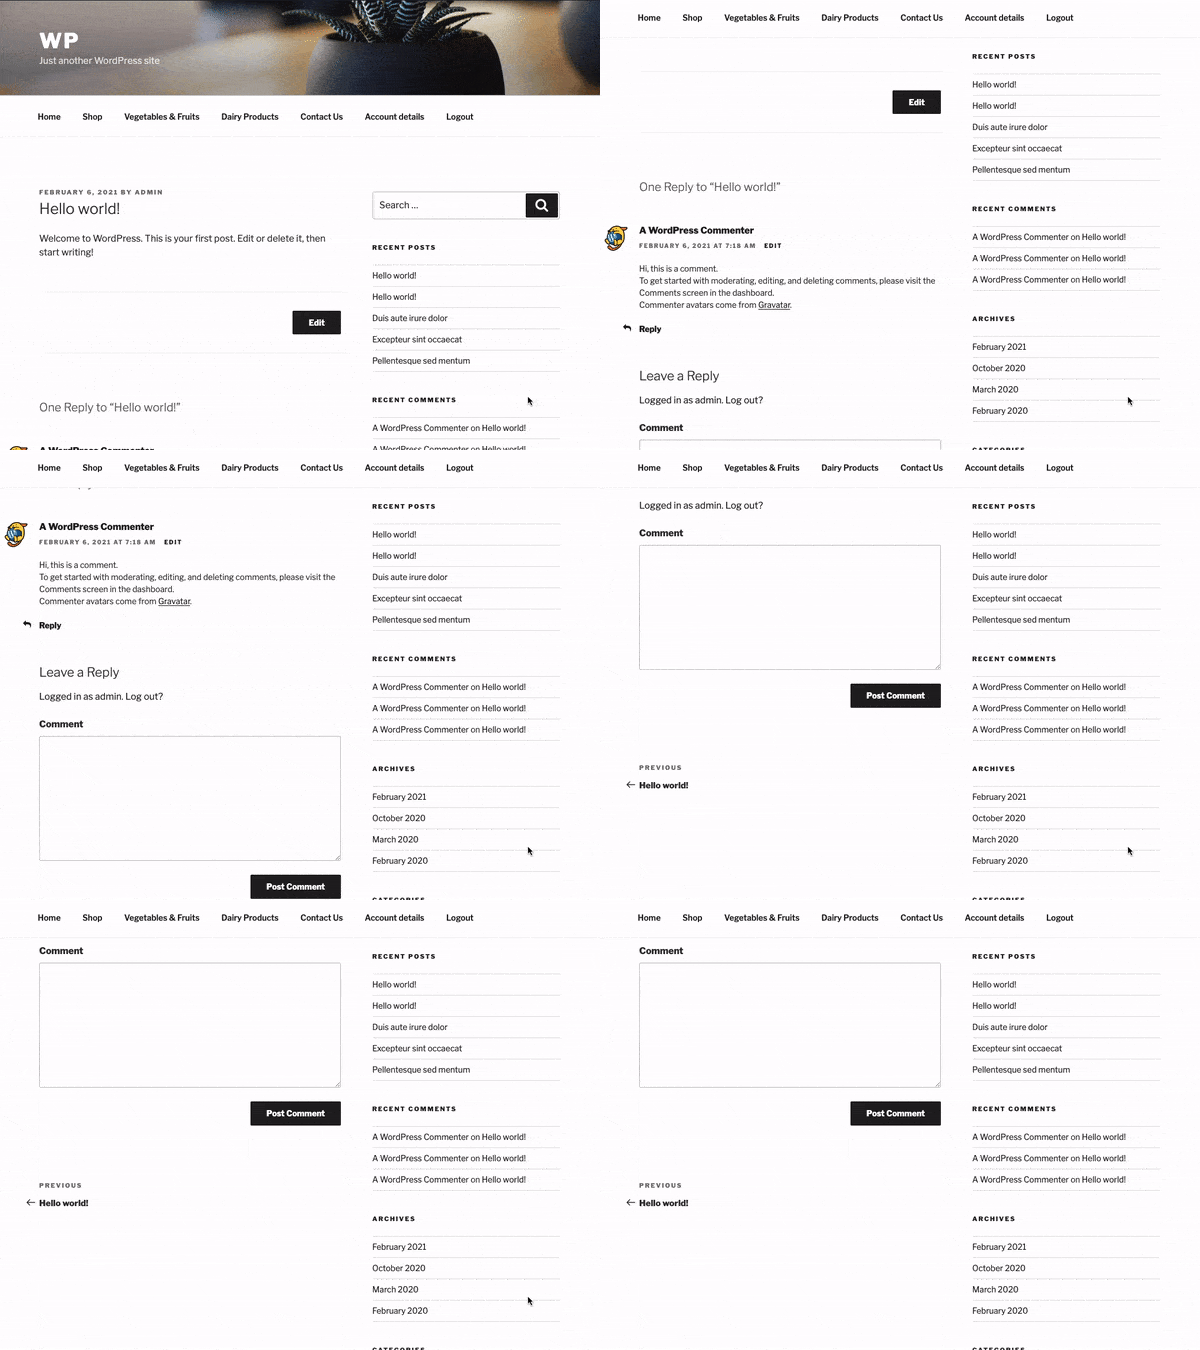
Now you can see Sticky Sidebar or Scrolling Sidebar Widgets on your website.

Benefits of Using Sticky Sidebars.
- Show your Visitors your recent post while scrolling.
- You display a sticky calendar, promotional code, or special offers to your visitors.
- You can also display sticky advertisements on your sidebar.
- With a sticky sidebar, adding navigation links and other types of elements is easy.
Conclusion–
This is how you can add a Sticky Sidebar or Scrolling sidebar on your website.
Setting up a Sticky WordPress sidebar doesn’t need to be difficult, particularly if you’re using the Sticky Sidebars plugin, it makes it easy.
I hope the article, How to add Sticky Sidebar or Scrolling Sidebar in your WordPress Website will help you to create custom Sticky Sidebars in your website.
If you have any questions regarding anything, do not hesitate to just comment below, and we will help you to solve your problem. Thanks for reading this blog. 🙂
Please Subscribe to our YouTube Channel, we also upload great content there and also Do Follow us on Facebook and Twitter
Read More-
