Plugin Installation ( Free Version )
Th All in One Woo Cart Plugin is a perfect choice to display Cart on your website and improve your potential customer’s buying experience.
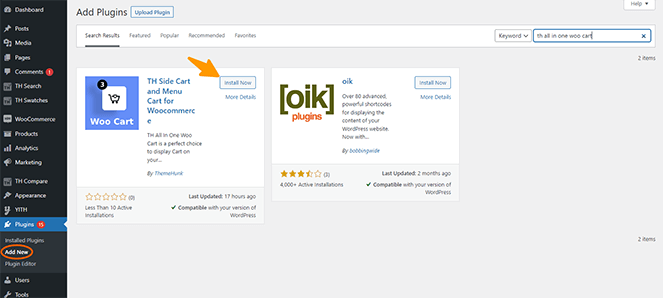
- Step 1: Go to your Wp Dashboard > Plugins > Add New. Then in the search box, enter the name “Th All in One Woo Cart”. Plugin will appear. Then click on the ‘Install Now’ button.
- Step 2: After the installation is completed, click on the ‘Activate’ button and “Th All in One Woo Cart” will be activated.

-
- Step 3: After activating “Th All in One Woo Cart” in your dashboard, you can see the “Themehunk” tab on the right side. Under it you’ll find Th AIO Woo Cart tab, click on it. Now you can start customizing it.

Plugin Installation ( Pro Version )
-
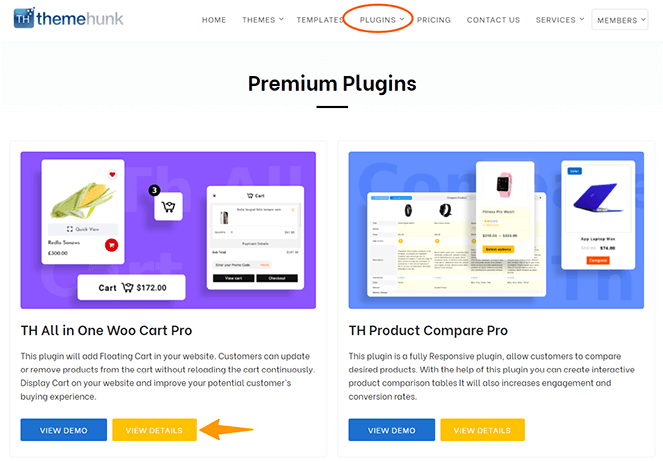
- Step 1: Navigate to the ThemeHunk homepage, You will see “Plugins” menus on the top, click on it. On this page you’ll see TH All in One Woo Cart Pro, click on the view details button.
-
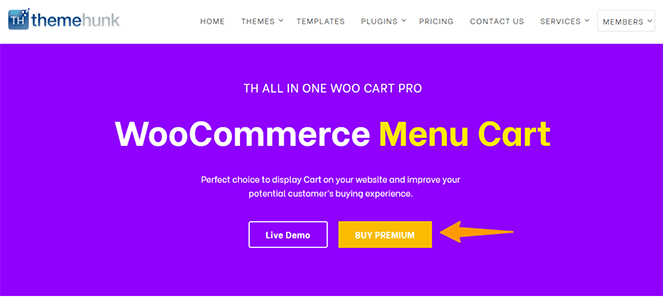
- Step 2: You’ll now navigate to the Plugin page. Afterward, just simply hit the ‘Buy Premium’ button and it will directly take you to the ‘Pricing‘ section of Th All in One Woo Cart Pro Plugin.
-
- Step 3: Now choose your desired plan from here and hit the button Buy Now from the desired table.

-
- Step 4 : Purchase your plugin from here, fill all the required details. Login to your member’s area. Your pro plugin has been added in your member’s area dashboard.
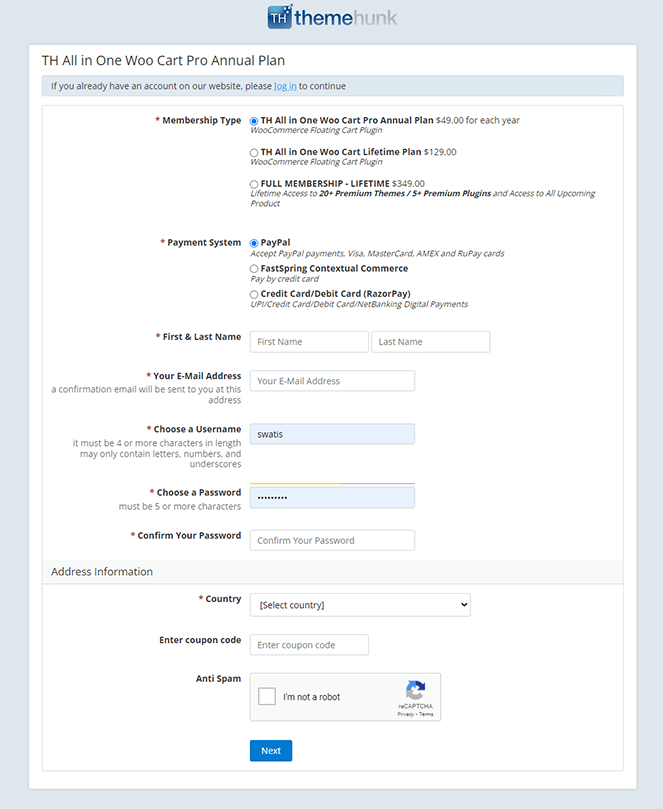
- Step 5 : You’ll see a Th All in One Woo Cart Pro plugin zip file in your Member’s area. Download the zip file of plugin.
- Step 6 : Now, Open your WP Dashboard > Plugins > Add New > Upload the Plugin Zip file and Activate it.
- You can See “Th All in One Woo Cart Pro” panel in your dashboard.
Using Shortcode
- You can easily add Th All in One Woo Cart to your website with a shortcode. You can use a Shortcode block, Widget, or any page builder shortcode add-on to display the cart.
[taiowc]

Using PHP
- You can add a Cart using PHP.
- Add this PHP code at the desired location in any PHP file
<?php echo do_shortcode('[taiowc]'); ?>

General Setting
Go to Th All in one Woo Cart > General setting. In this panel, you’re allowed to change the setting of your shopping cart.
How to Add Floating and Fixed cart?
- Go to Th All in one Woo Cart > General > Enable Cart.
- Enable Cart – Using this option you can enable or disable Floating and Fixed carts from your site. Floating cart Fixed cart is a quick panel that will give shoppers a simple way to check out with a click.
- If you’ll disable the floating cart from your site till you’re allowed to add a cart using Shortcode and Menu cart.

How to Style Cart?
- Go to Th All in one Woo Cart > General > Cart Style.
- Cart Style (Pro) – In Cart Style there are two different Cart Layouts. Both layouts will display Fixed Cart on your website.
- Fixed Cart Position – In layout 1, you can add the cart position in px from left, right, and bottom. and in Layout 2 you can choose the cart position Left or Right.

- Cart Open Style (Pro)– There are three Cart open styles i.e Slide left, Slide right, and Dropdown on click.
- With the Free version, you’ll get Slide Right open style.
Cart Basket Setting
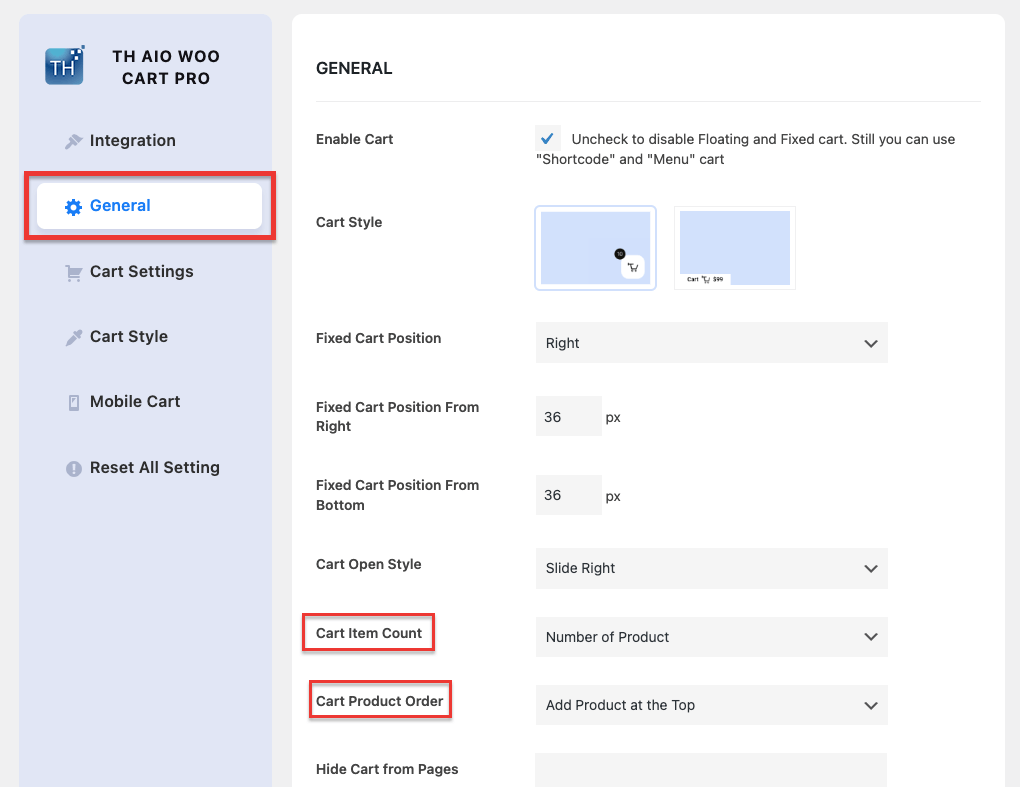
- Go to Th All in one Woo Cart > General > Cart Basket Setting.
- Cart Item Count – You can display the number of products added to your basket or you can show the Sum of the quantity of all products you have added to your cart.
- Cart Product Order (Pro) – This setting will order your recently added product on Top or Bottom.
How to Hide Cart from Pages?
- Go to Th All in one Woo Cart > General > Hide Cart from Pages.
- To hide Cart from site pages, just Use post type/page id/slug separated by a comma. For eg: post,contact-us, and about-us. For all non woocommerce pages, use no-woocommerce. For the checkout page use checkout, and for the cart page -> cart.

Cart Heading Setting
- Go to Th All in one Woo Cart > General > Cart Heading.
- You can add the cart heading text, Empty Cart Button Text, and Empty Cart Button URL.

Add/Upload Icon Image(Pro)
- Go to Th All in one Woo Cart > General > Choose Cart Icon.
- From this option, you can choose desired cart image for your cart from the given cart icon images.
- You can also upload custom icon images too.

Cart Open Style Animation
- Go to Th All in one Woo Cart > General > Cart Open Style.
- Auto Open with Ajax – It will open your cart with the default ajax style.
- Auto open with image fly effect (Pro) – With this Image flying animation, When your customer clicks on to “Add To Cart” button, smooth flying animation of the product image will be displayed. The product image will fly from the original product image position to the fixed cart or floating cart.
Product List Setting (Pro)
-
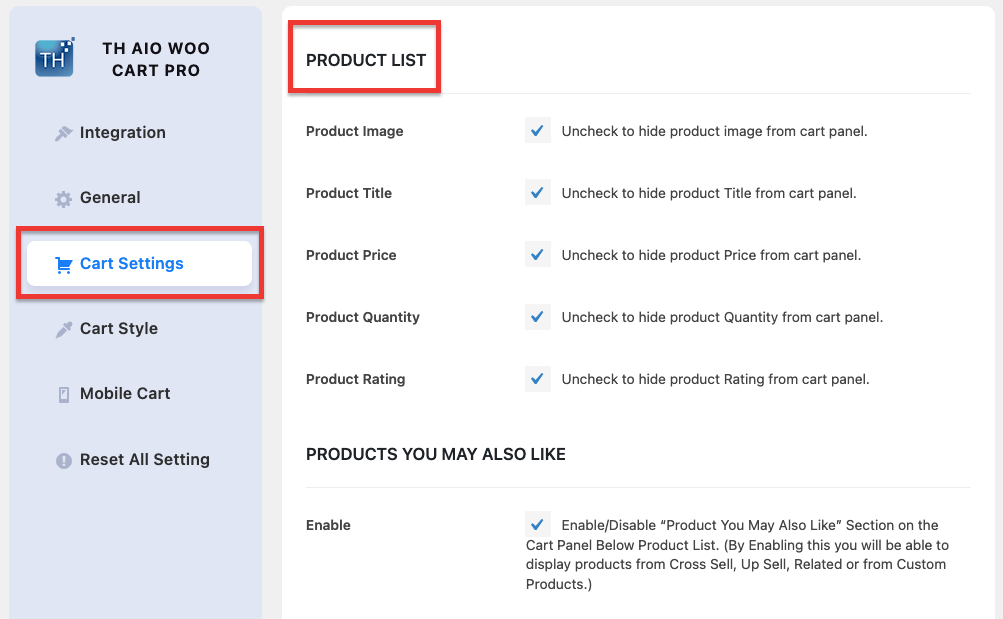
- For this setting go to Th All in one Woo Cart > Cart setting > Product list.
- Product Image – You can show or hide the Product image from the Cart panel.
- Product Title – You can show or hide the Product Title from the Cart panel.
- Product Price – You can show or hide the Product price from the Cart panel.
- Product Quantity – You can show or hide Product Quantity from the Cart panel.
- Product Rating – You can show or hide Product Ratings from the Cart panel.
Product you may also like Setting (Pro)
-
- For this setting go to Th All in one Woo Cart > Cart setting > Product you may also like Setting.
- Hide or show Products – Using this option you can hide and show the slider displays the below-added product list in the cart panel. This slider displays products from Cross Sell, Up Sell, Related or custom products depending on the option you choose below.
- Heading – You can add a panel heading here which will display your added products.
- Choose product – You can choose the crosse sell, upsell, related, and your products to display in your cart panel.
- Product Slug – You can add product slug here. Use Product Slug separated by a comma.

Payment Setting (Pro)
-
- For this setting go to Th All in one Woo Cart > Cart setting > Payment Setting.
- Payment Heading – Add your payment heading text here.
- Sub-total Text – Add sub-total text here.
- Show shipping & Text – You can display the shipping zone with your products. Also, add the shipping text.
- Show discount – You can show or hide the discount on your product.
- Discount text and Total text – Add the discounted text and total text here.

How to add shipping zones to your products
-
- To add shipping zones to your products, Go to WooCommerce > Settings > Shipping. If you don’t see Shipping as an option, go back to WooCommerce > General and take a look at settings at Shipping Location(s) – you may need to enable shipping settings there.
- Now navigate to WooCommerce > Settings > Shipping > Shipping zones.
- Select Add shipping zone at the top. Now Enter a descriptive Zone Name, and select Zone Regions that apply.

Coupon Setting (Pro)
-
- For this setting go to Th All in one Woo Cart > Cart setting > Coupon setting.
- Show Coupon – You can show or hide discount Coupons from the Cart panel.
- Placeholder Text – You can add your promo code here.
- Show Coupon List – You can show or hide the Coupon list from the Cart panel.
- View Coupon Link Text – You can add coupon link text.
- Show Added Coupon – You can show or hide Added coupon from the Cart panel.

How to Create Coupons and Coupon Codes.
-
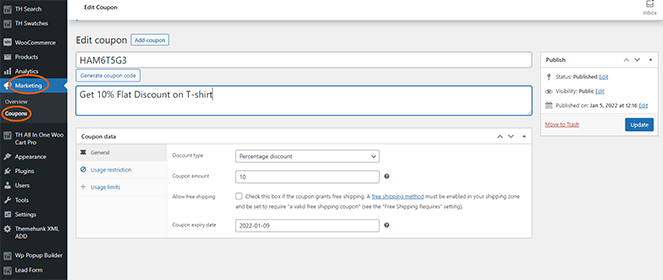
- To create a coupon, Go to WooCommerce > Marketing > Coupons tab. Add the coupon code with the coupon description.
- The type of discount you want to offer for the code. You can choose from three types – Percentage discount, Fixed cart discount, and Fixed product discount.
- Coupon amount – Here you can Enter the amount that is being offered.
- Allow free shipping – Check this box if the coupon also offers free shipping.
- Coupon expiry date – Pick the date when the coupon expires.
Fixed Cart/ Floating Cart Styling (Pro)
-
- For this setting go to Th All in one Woo Cart > Cart style > Fixed Cart/ Floating Cart Styling.
- Icon Size – You can add the desired size of your Fixed cart icon.
- Border Radius – You can add the desired border-radius of your cart icon.
- Show quantity – You can show or hide Product Quantity from the Cart panel.
- Cart icon color & BG color – You can pick the color for the cart icon & Background.
- Quantity Color & BG Color – You can pick the Quantity background color.

Cart Panel Styling (Pro)
-
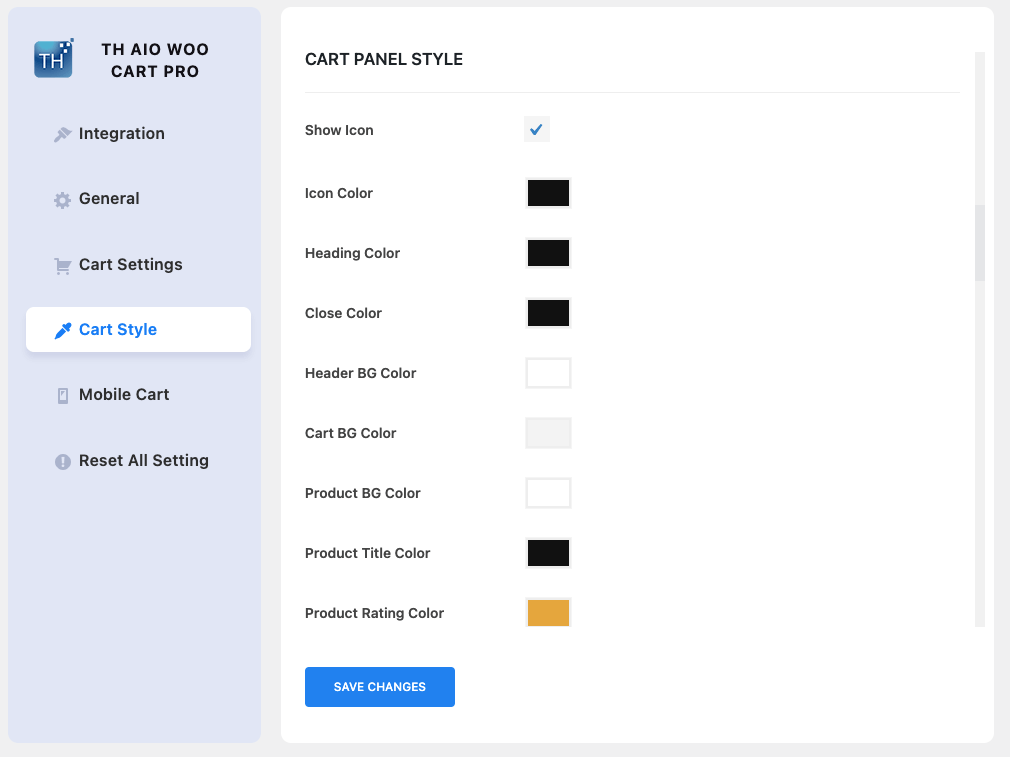
- For this setting go to Th All in one Woo Cart > Cart style > Cart Panel Styling.
- Show icon – You can show or hide the Cart icon from the panel.
- Icon color – You can pick the color for Icon Color, Heading Color, close Color, and Header BG Color.
- Cart BG Color – You can pick the color for Cart BG Color.
- Product Color – You can pick the color for Product BG Color, Product Title Color, Product Rating Color, Product Delete, Product Text, and Product Border.
Cart Panel Product you may like the styling (Pro)
-
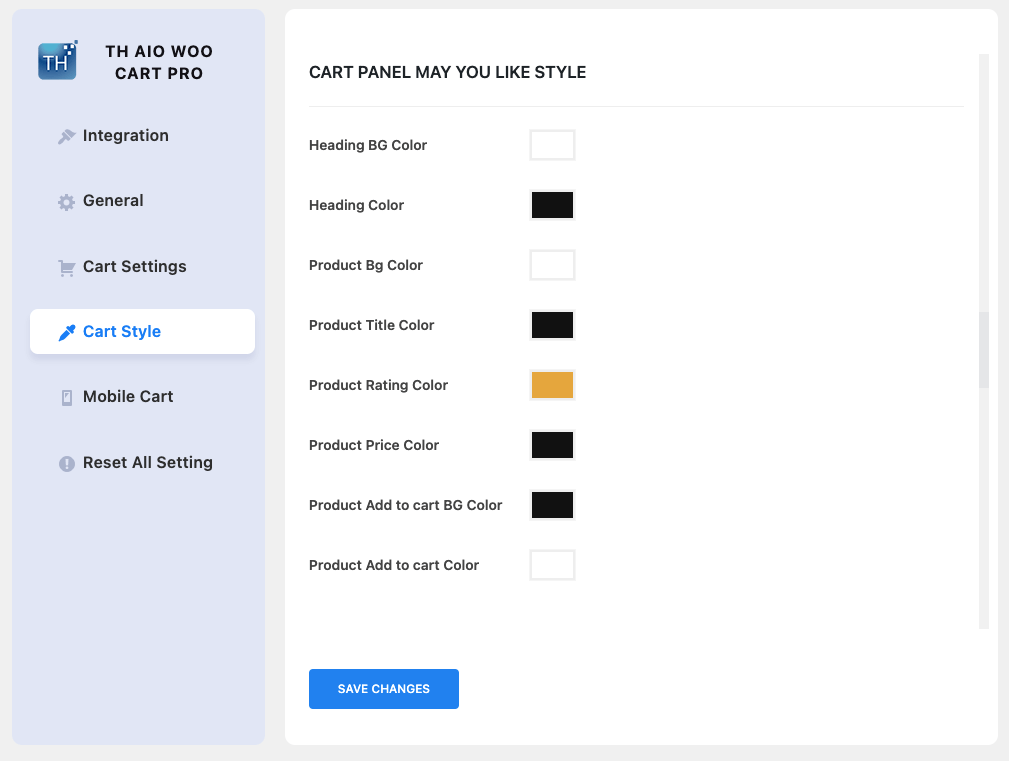
- For this setting go to Th All in one Woo Cart > Cart style > Cart Panel Product you may like styling.
- Heading color & Heading Background color – You can pick the color for Heading BG Color and Heading Color.
- Product Color – You can pick color Product Bg Color, Product Title Color, Product Rating Color, Product Price Color, Product Add to cart BG Color, and Product Add to cart Color.
Payment Styling (Pro)
-
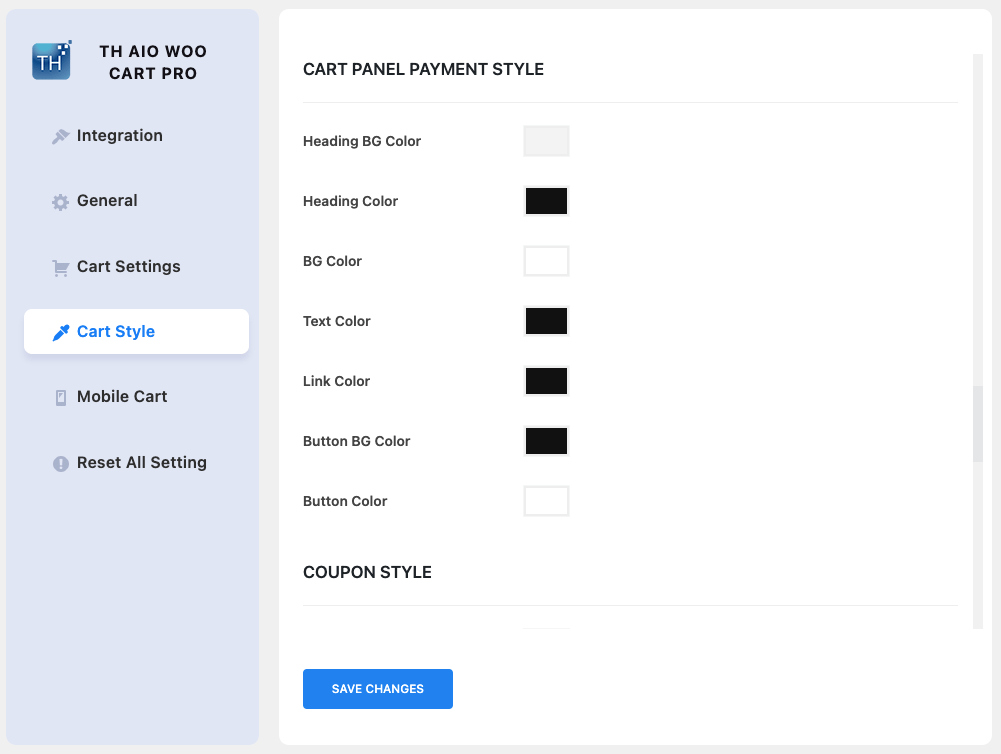
- For this setting go to Th All in one Woo Cart > Cart style > Payment Styling.
- Heading color & Heading Background color – You can pick the color for Payment Heading BG Color and Heading Color.
- BG Color- You can pick the color for Payment BG Color.
- Text & Link Color- You can pick the color for Text Color and Link Color
- Button color & BG Color – You can pick colors for buttons and background colors.
Coupon Styling (Pro)
- For this setting go to Th All in one Woo Cart > Cart style > Coupon style.
- Coupon Styling options – You can pick the color for Coupon Box BG Color, Coupon Box Border Color, Coupon Box Text Color, Coupon Box Submit Color, Coupon View Color, Coupon Code BG Color, Coupon Code Border Color, Coupon Code Text Color and elements too.

Cart Panel Notification Styling (Pro)
-
- For this setting go to Th All in one Woo Cart > Cart setting > Product list.
- Show Notification – You can show or hide Show Notification from the Cart panel.
- Success BG Color and Success Text Color – You can pick the color for Success BG Color and Success Text Color.
- Error BG Color and Error Text Color – You can pick the color for Error BG Color and Error Text Color.

Mobile Cart (Pro)

- For this setting go to Th All in one Woo Cart > Mobile Cart.
- Disable Cart – You can enable or disable Menu Cart / Shortcode Cart on mobile.
- Disable Cart Quantity – You can enable or disable Cart Quantity on mobile.
- Disable Cart Price – You can enable or disable Cart Price on mobile.
Fixed Cart/ Floating Cart (Pro)
- Disable Fixed Cart/ Floating Cart – You can enable or disable the Fixed Cart/ Floating Cart on the mobile device.
- Disable Cart Quantity – You can enable or disable the Cart Quantity of fixed cart/floating cart on mobile.
Cart Panel (Pro)
- Disable Products you may like – You can enable or disable Products you may like on a mobile device.
- Disable Shipping – You can enable or disable Shipping on mobile.
- Disable Coupons – You can enable or disable Coupons on mobile.
Reset all Setting (Pro)
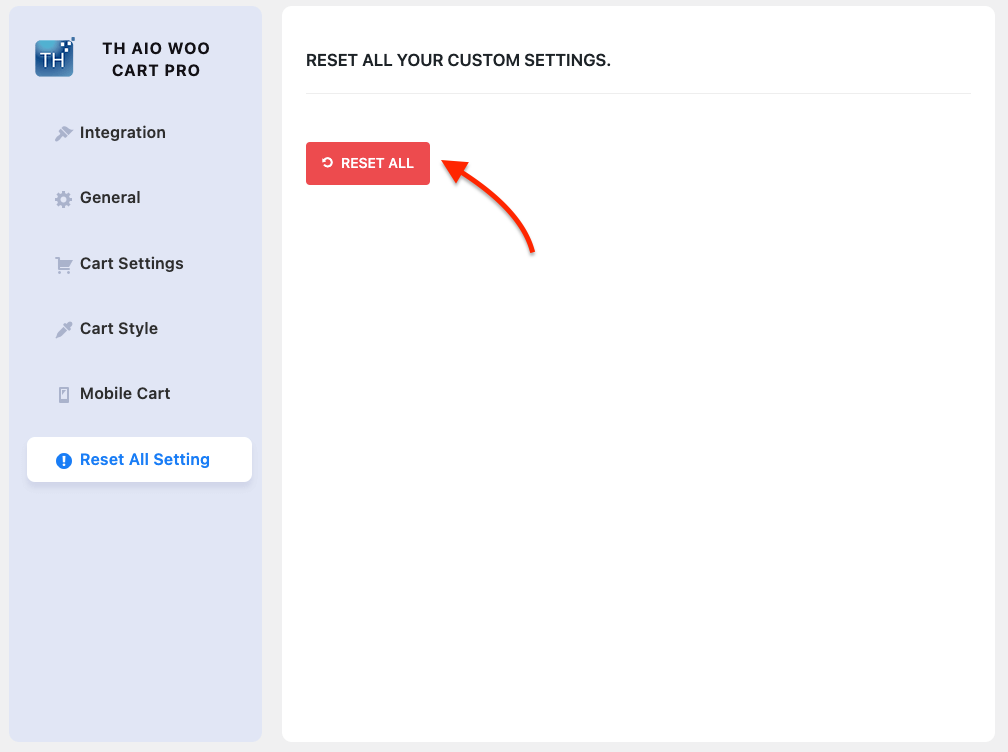
- From this option, you can reset all plugin changes. Just click on the Reset all button.
