Hello guys, do you want to get leads from google emails? then this blog is for you, in this blog we’re going to tell you how you can set up a Google One Tap Login on your WordPress website for lead generation.
If you want to get leads from your website visitors and want to get their names and Email IDs, then we have a plugin that will help you to get leads with just one click.

We have a WordPress plugin called Lead Form Builder that has a unique feature, that helps you to generate leads from your website with the Google One Tap Sign-in feature.
Today we will learn how to integrate Lead Form Builder on your website so that you can get Google Email leads easily on your dashboard.
Setup Google One Tap Login with Lead Form Builder
You can seamlessly intricate Lead Form Builder Pro plugin with Google One Tap Login Feature. We’re going to show you the process.

Firstly you have to create Google API Key, to use this feature with Lead Form Builder Pro Plugin. Just follow the below steps to create Google API.
Create Google APIs
To create Google App API you have to visit the Google Developers Console website. Here you have to log in with your Google account, from which you wish to create APIs.
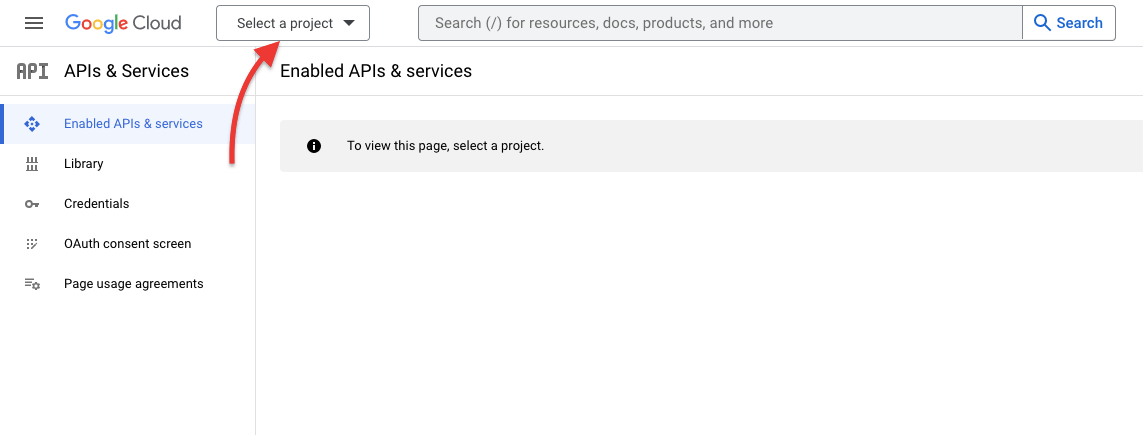
After logging in to Google App you need to click on “Select a project” from the top menu. As shown in the screenshot below.
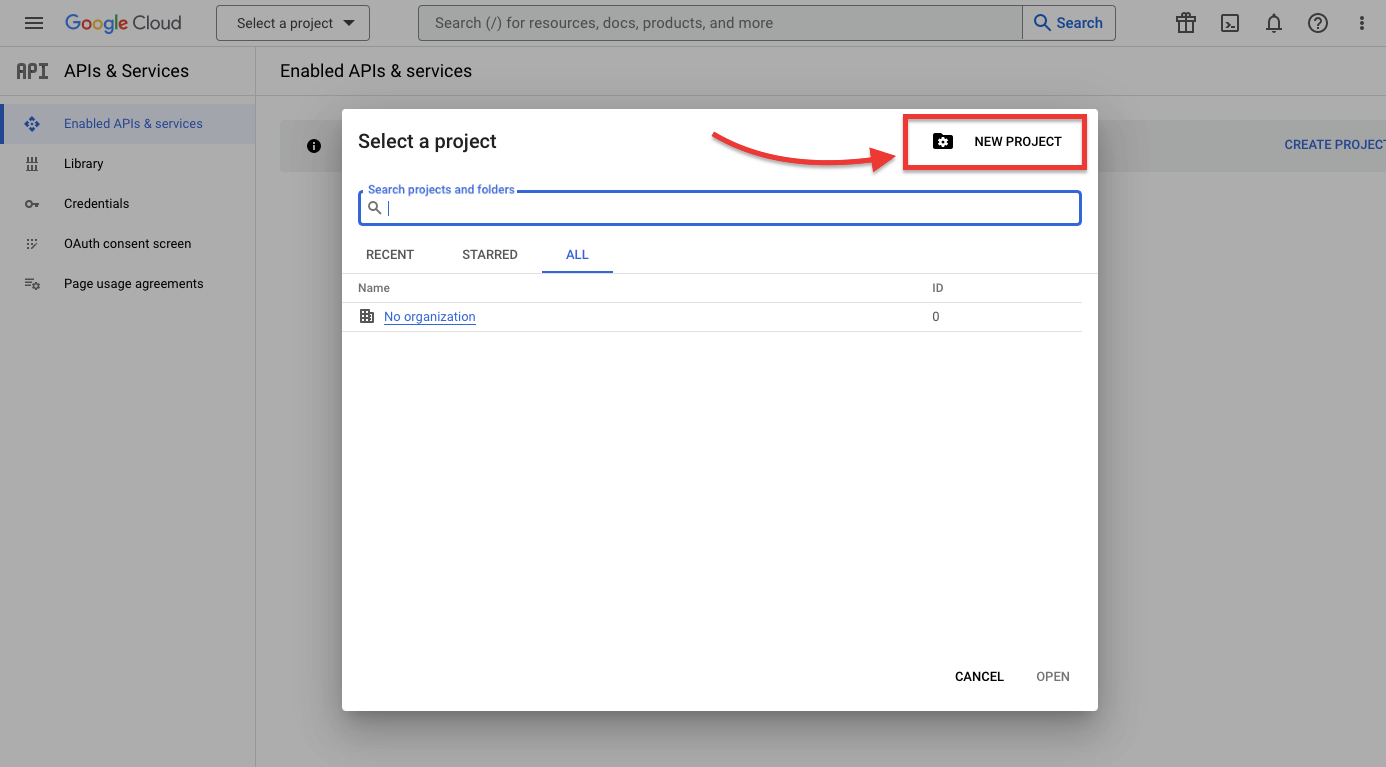
It will open a popup where you would click the “New Project” button to continue. As shown in the below screenshot.
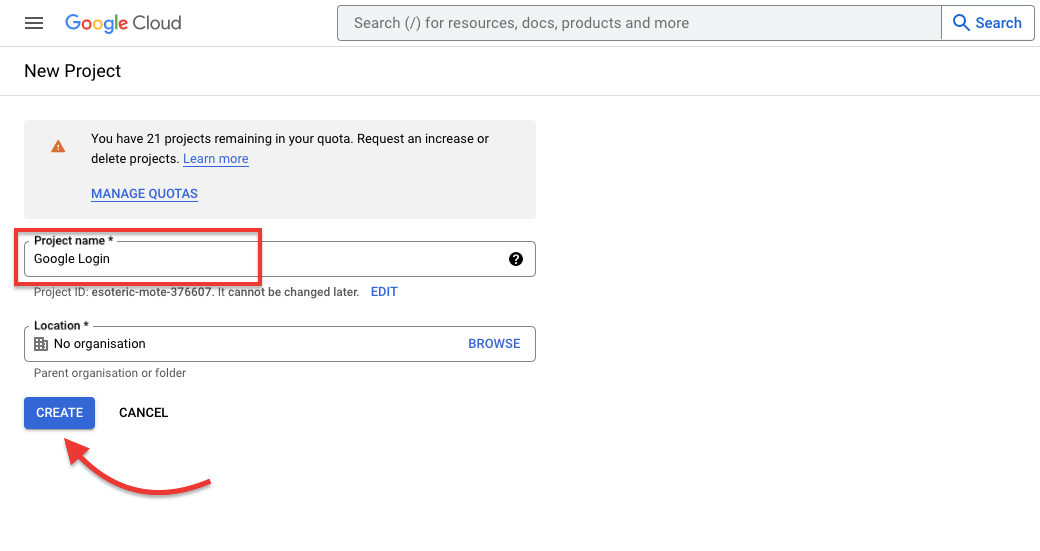
When you click on the “New Project” link, this will take you to the New Project page. Here you will need to add a project name and location. After that Next, click on the “Create” button to continue.
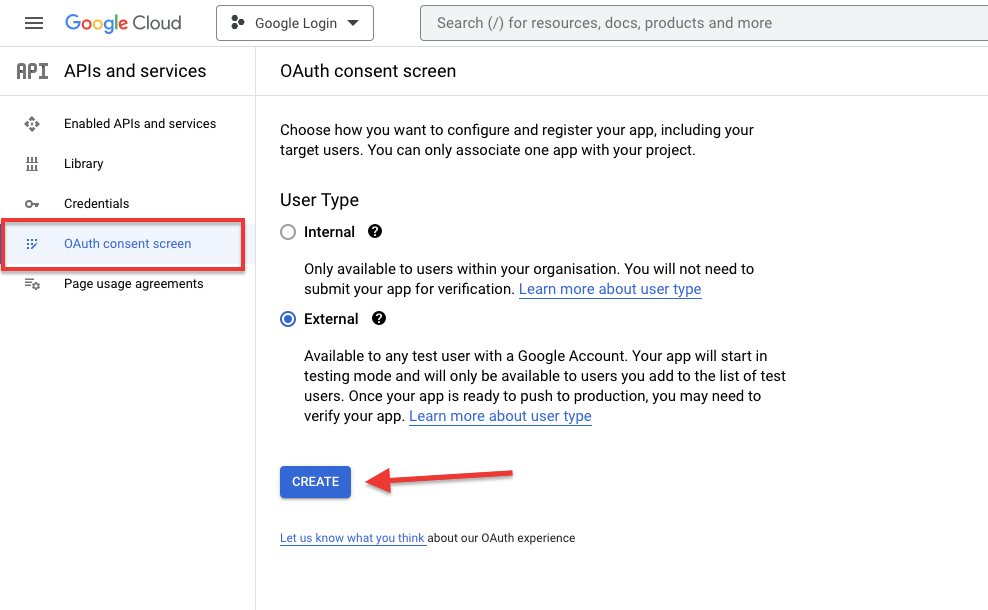
In the next step, Now you will be redirected to the “APIs & Services” Dashboard. On this page, you need to click on the “OAuth Consent Screen” on the left side of the menu tab.
Here you have to select the “External” option and click on the “Create” button, as shown in the screenshot below.
In the next step, you have to fill in some App information. Like your App or Website Name, User Support Email.
Note- We recommend you to not upload an App Logo because it is a long process that that up to 4-5 weeks to approve.

Once you’ve done that, scroll down to the “App domain” section, and here you have to insert the link to your website Homepage, Privacy Policy, and Terms of Service.
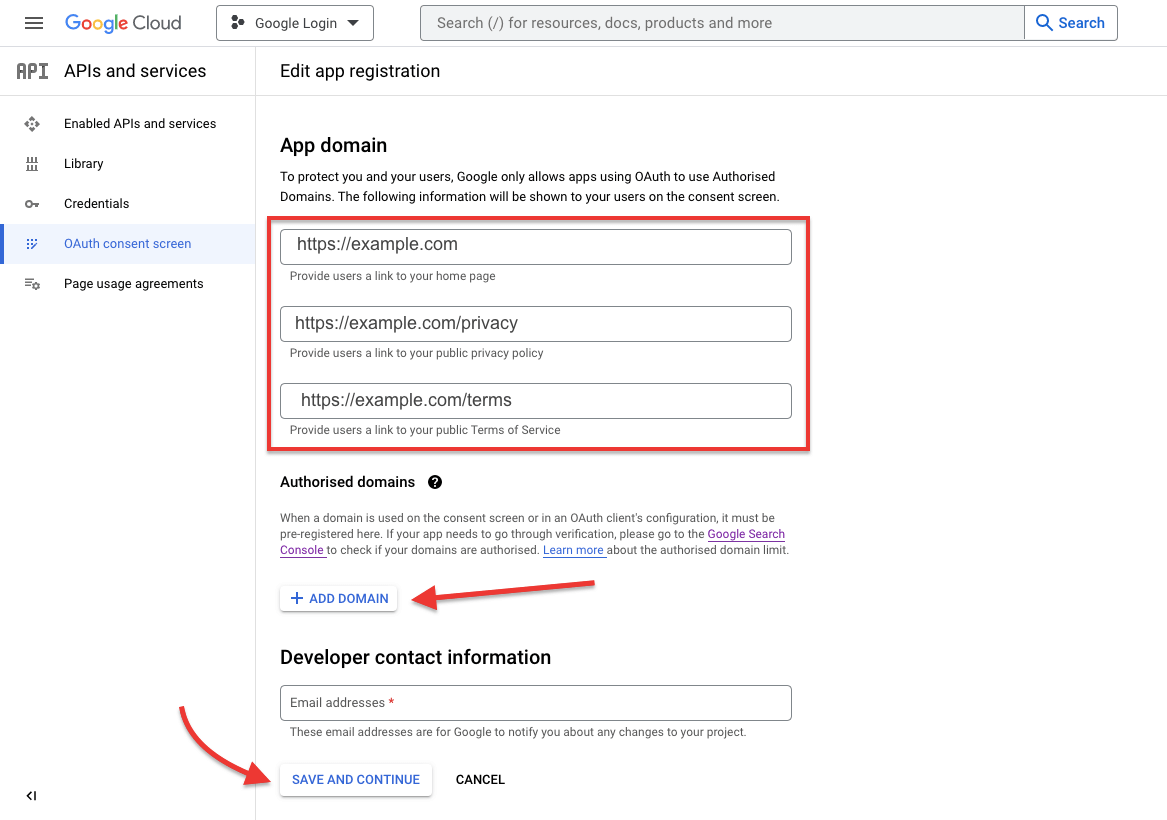
After that, add a Domain name where you want to use this API. and enter a contact Email Address. Now click on the “Save and Continue” button to proceed further.
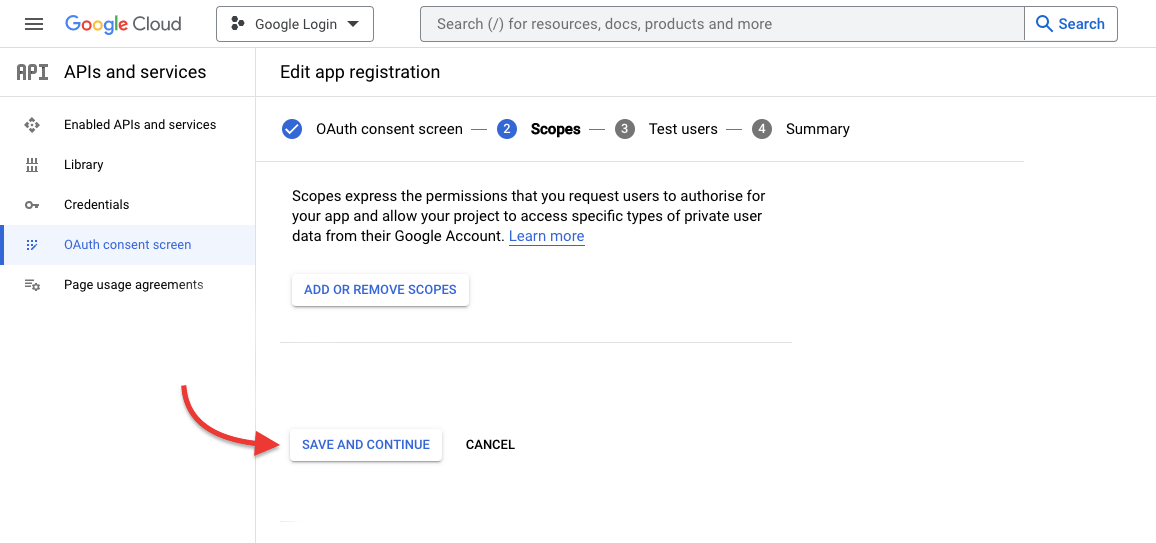
In the next Scopes section, click on “Save and Continue” as shown in the screenshot below.
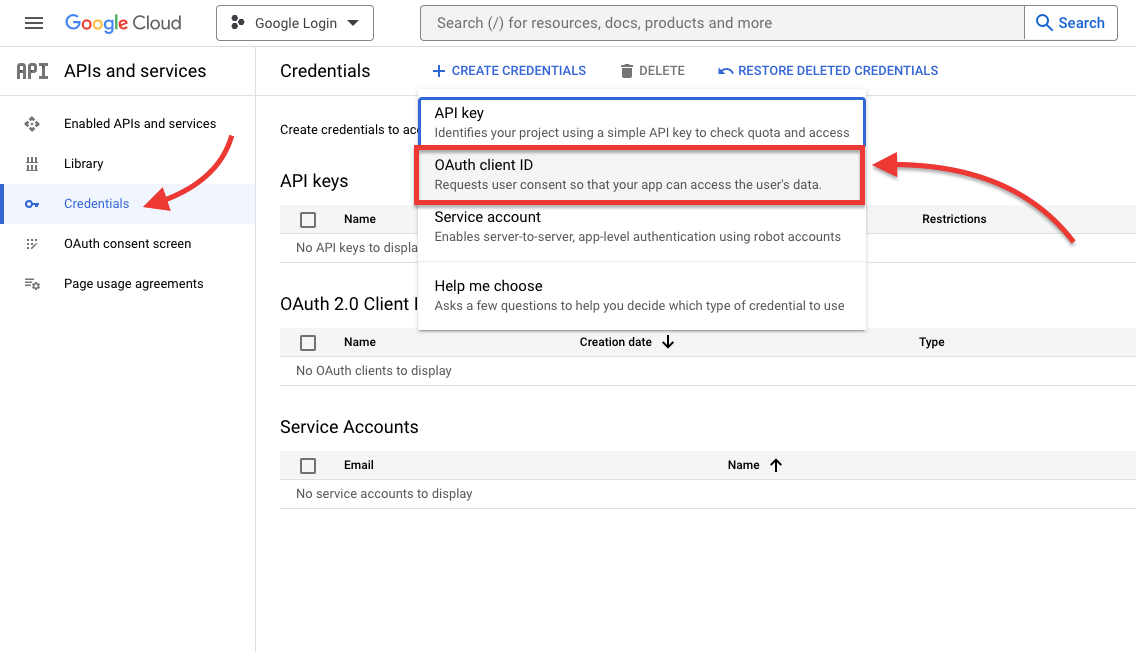
Now on the next step, you need to click on the “Credentials” option on the Left Menu Bar as shown in the screenshot below.
After that, you need to click on “Create Credentials” and select the “0Auth Client ID” option, as shown in the screenshot below.
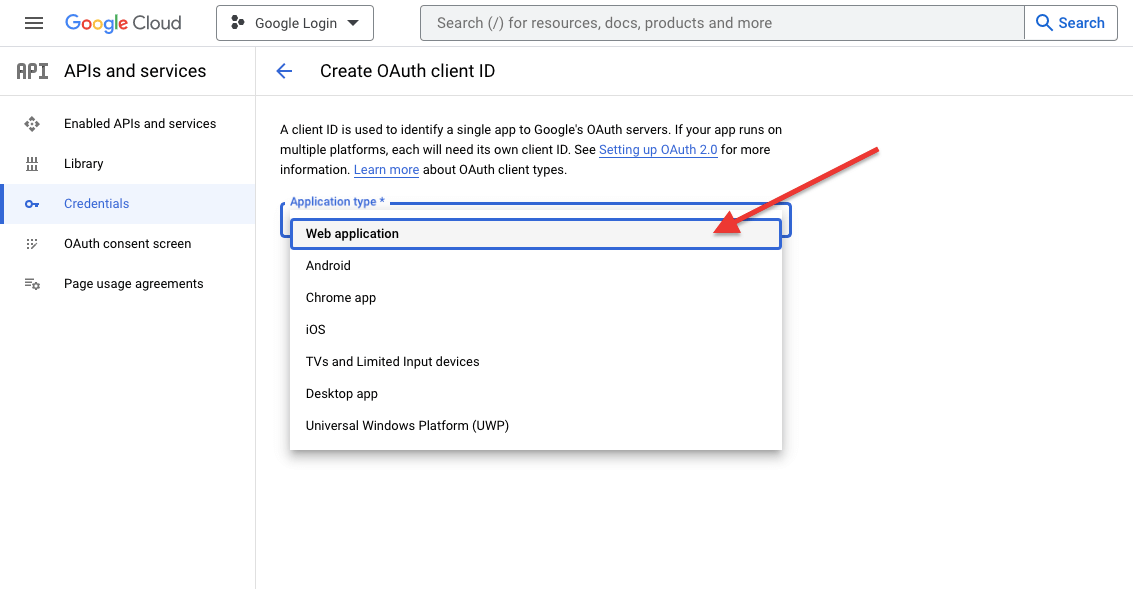
This will take you to the “Create OAuth client IDs” page. Here You should select “Web application” from the “Application type” dropdown.
We’re using this API for the Website, so click on the “Web Application” option.
This will take you to the “Create OAuth client ID” page. Here you have to enter the URL of your website. add an Authorised redirect URL where you want to take your user after the login. After that click on the “Create” button.

Congratulations Your OAuth client has now been created. Now you will see a popup window with “Your Client ID” and “Your Client Secret” as shown in the screenshot below.
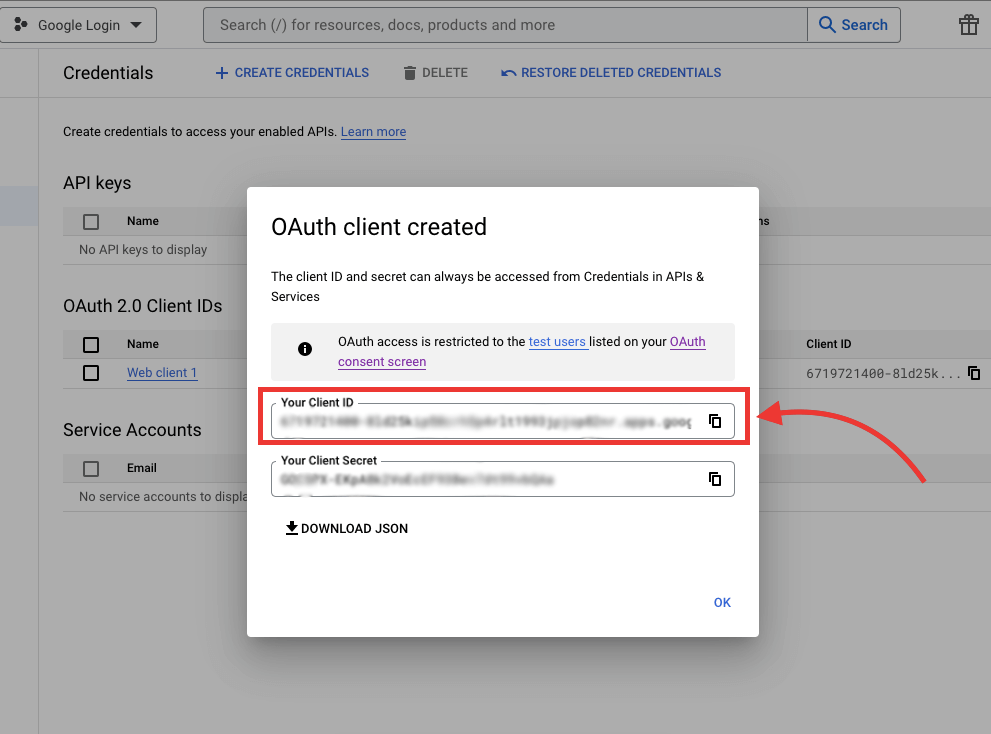
Now you have to copy “Your Client ID” and use this ID to Lead Form Builder Plugin.
Now let’s know how you can enable the One Tap Google Lead Generation Plugin feature.
Install Lead Form Builder Pro Plugin
You already have the Lead Form Builder Pro plugin, please update your plugin to the latest version. and if you do not have a pro version of the plugin you can buy a plugin form here
Now after installing or updating the Lead Form Builder Pro plugin. Follow the below steps to set up the Google One Tap Login Lead Generation Plugin feature.
Follow these steps-
Navigate to Dashboard > Themehunk > Lead Form Builder Pro and click on the “Add New” button. as shown in the screenshot below.

After clicking on the “Add New” button you will see the Form Settings Page, as shown in the screenshot below.

On the Form Settings page, you have to create a simple form by just adding some fields like Name, Email, Profile Picture, etc. as you can see in the above screenshot.
After creating fields click on the Save Form Button.
Now again go to Lead Form Builder Pro Page on your Dashboard, click on the “View Add-Ons” button, and click on the One Tap Google Auto Sign-in option, as shown in the screenshot below.

Now you will see One Tap Sign in With Google Settings Page. Here you have to set up a few settings like:
- Enable the Extension
- Google API- Past the Google API that you have created
- Redirect URL- Enter a Redirect URL eg. Homepage
- Mapping- Here you have to add the Lead Form & Google Data Mapping fields.
- After doing all steps now click on the Save button.


Congratulations you have successfully enabled Google One Tap Login on your website!
Now when any visitor comes to your website, they will see a Google One Tap Login popup on the Top Right Side of the website. As you can see in the screenshot below.

Now when any user Signs in with their account on your website, they will also store on the Lead form builder database as leads.
To see these leads navigate to Download > ThemeHunk > Lead Form Builder and click on the Total Leads option.

This will take you to a new page where you will see the received leads with details. You can see every single lead detail by clicking on the View link. You will able to see the Name, Email, Profile Picture, IP Address, Country, and URL

Here is an example:

So this is how you can create Google One Tap Login For Lead Generation on your website.
FAQ
Q: What is Google One Tap Login?
Ans: Google One Tap Login is a feature that allows users to log into any website or application quickly and securely using their google account via a single click.
Q: Can we use Google One Tap Login on WordPress?
Ans: Yes we can use Google One Tap Login on WordPress sites.
If you find this article helpful, do share it with your friends. And If you have any questions regarding this, do not hesitate to comment below. If you find any difficulty with Google One Tap Login you can ask via the comment section below. or Contact Us Here
Please Subscribe to our YouTube Channel, we also upload great content there and also Do Follow us on Facebook and Twitter