There is an amazing feature in WordPress that you to create your site as a WordPress Multisite. It doesn’t take hard steps, you have to follow just some simple steps and you can make your own multi-site.
Before creating WordPress Multisite let us learn why it is necessary to create. Actually, it is a collection of sites by which you can create a single WordPress install.
So if you want your user to create their site then they can use a theme and plugins to make their own site.
Install WordPress Multisite
So in this blog, I am going to explain to you how you can create your Pre-installed WordPress as a multi-site WordPress.
Step 1: Make your WordPress ready.
- As you have already installed your WordPress so you need to copy all the content, before making it multisite. If you are installing a fresh copy then you don’t have to use this step.
Step 2: Inform WordPress.
- In this step, we are going to inform WordPress that it is going to be created as a WordPress Multisite.
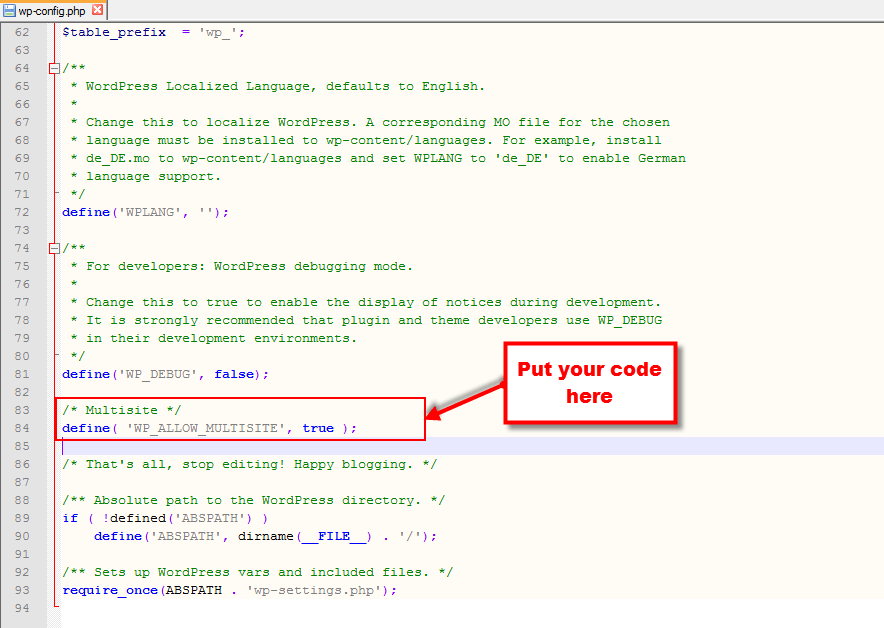
For that just open your “wp-config.php” file and write the following code above line /* That’s all, stop editing! Happy blogging. */
Code is
/* Multisite */
define( ‘WP_ALLOW_MULTISITE’, true );
You will get this file in your WordPress directory.
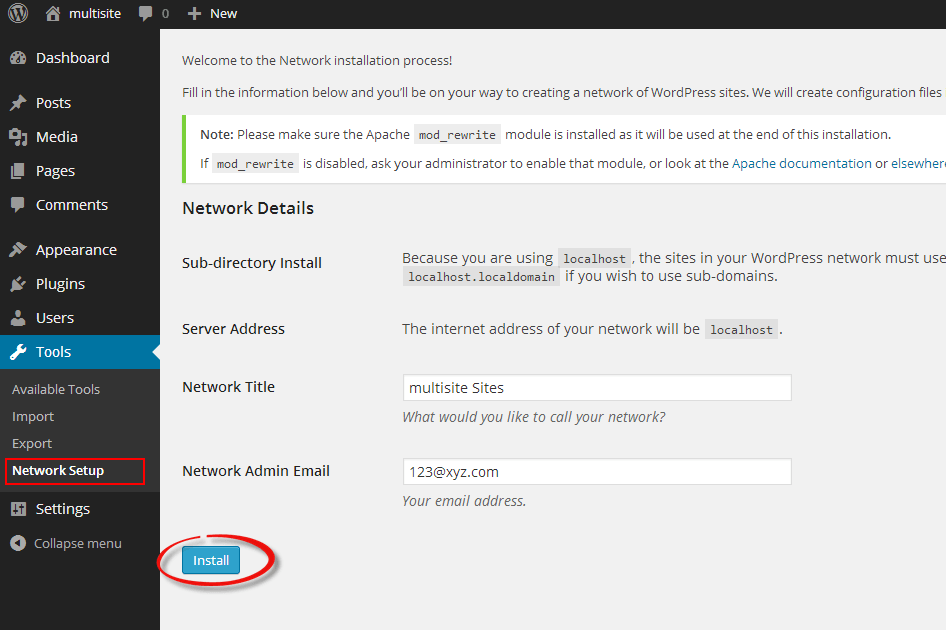
Step 3: Installation in WordPress
- After adding the code open your dashboard and go to “Tools -> Network Setup” and click on the “Install” button.
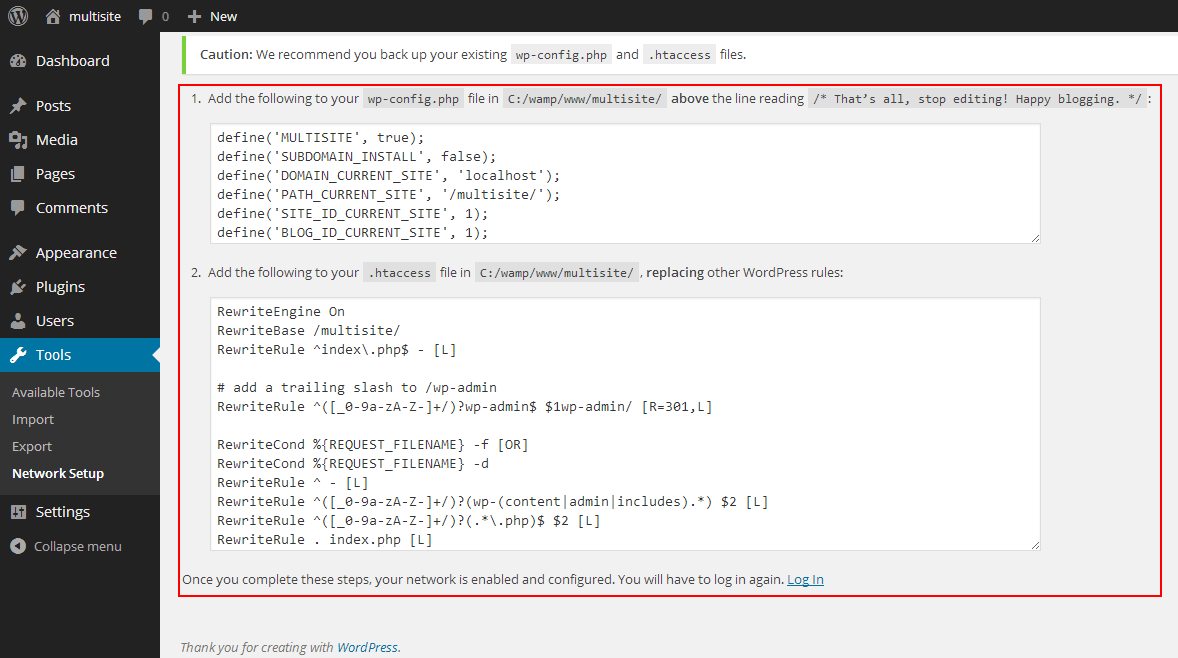
- As soon as you click on the “Install” button WordPress will give you some code to add to the “wp-config.php” file and the “.htaccess” file above /* That’s all, stop editing! Happy blogging. */
- After completing these steps your multisite network is ready. Simply log in to your dashboard again and start using your multisite network.
Hope this guide on creating WordPress Multisite will help you. Give your fruitful comments below.
Read More –